GOODNESS ME! It has been a while. I have really wanted to add to my blog but life has taken a few turns and frankly, there has not been the time.
I started a new job back in August, or more accurately, had somewhat of a career change. So partly I have been busier, but more importantly, I have been learning a lot of new stuff and I have found it hard to concentrate on my creative pursuits.
But I am now beginning to come back here. I can not promise it will be with as much regularity as before, but there are definitely blog post which have been nagging my brain and really need to find a home here!
So on with the latest post.......
"Where the needs of the world and your talents cross, there lies your vocation. " Aristotle
 I have had thoughts of engaging in some kind of altruistic pursuit for some time now. I do have the core belief that if your life and standard of living is good, then, as well as being grateful for your good fortune, one should give back to the community in some way. This has certainly been even more in my mind ever since I left the front line of the health care industry some months ago.
Back in October I held a charity lunch to raise money for the Oxfam organisation to assist them in their efforts during the famine in East Africa. The idea was that I would invite as many people as I could fit around my tables and cook them a 3 course meal. There was a suggested donation and all of the money raised would be sent directly to Oxfam. It was a fantastic day & we ended up serving lunch to 20 people. Everyone had a great time. There were extra donations made, both monetarily and with extra home made food provided by one of our guests in the form of some gorgeous home-grown and cured olives, home made salami and home made red wine!
THE MENU......
LUNCH MENU
ENTREE
eggplant, broad bean & garden pea timbale
with marinated feta heart
MAIN
wood fired oven slow roasted pork
green apple, red onion & sage roasted chutney
roasted potatoes
green bean and rocket salad
DESSERT
raspberry Crème brûlée with orange tuiles
Here are some pictures of the day by our good friend and talented photographer Adam Hacking....
 |
| Floral designs by Niddrie Flowers |
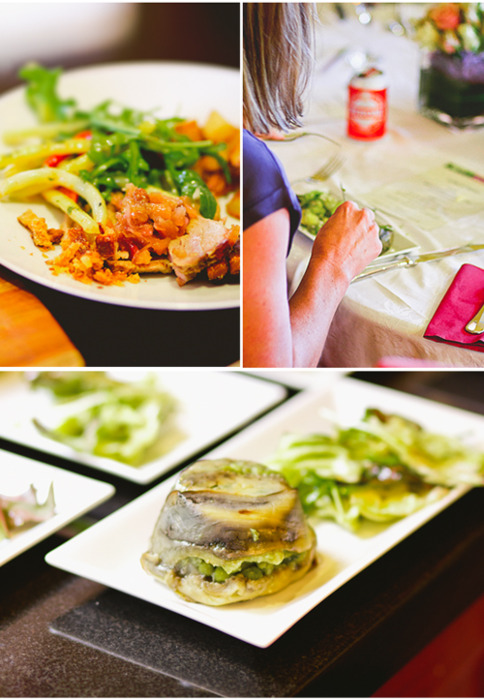 |
| The entree and main courses |
 |
| Dessert of Crème brûlée |
 |
| Some of those devine home prepared olives |
The recipe I would like to share with you in this post is Crème Brûlée.
I have noticed that whenever I mention Crème Brûlée people seem to respond as though they think that this is a tricky and complex dessert for a home cook and feel that most would not have the expertise to pull it off.
Well I would like to blow that myth apart right now!
The truth is Crème Brûlée is so easy that my young children could make it (for the most part) and there is no more expertise involved than making your average cake. In fact, arguably, there is less.
All Crème brûlée is, is a custard which cooks in a bain marie in the oven, covered in a thin layer of toffee. It's that toffee, and how to achieve it, that freaks everyone out!
Yes. You need to use a blow torch. Kitchen stores sell the re-fillable kind... but my discovery is that they tend to be expensive and a pain to keep re-filling. So I investigated my local hardware store for an alternative. BINGO! They have far sturdier hand held blow torch nozzles for around $30 which attach to very cheap disposable gas canisters! (about $5 - $10) This means no refilling which is far safer and less of a hassle for the user. Go check it out, you will not be disappointed!
A few tips on Crème Brûlée before we move on to the recipe.
If you are going to make these for a dinner party, save yourself much stress and pressure by making them the day before. They will benefit greatly from spending a whole day in the fridge. When it comes time to serve, all you need to do is the toffee coating.
When choosing a ramekin, take note of the volume. Measure the amount of millilitres it holds with some water before you start and calculate how many ramekins you will need. This recipe is based on 4 x 250 ml but you could adjust to smaller or larger.
You can use any fruit in this recipe. I have used frozen raspberries because they are easy and always great. You can use fresh fruit but keep in mind that if its a firm fruit like apple or pear, you may need to cook it before including it.
When preparing a bain-marie, avoid disaster by following these rules:
- Pre heat your oven.
- Boil a full kettle of water.
- Place the ramekins into an empty , deep baking dish and place onto your oven shelf. DON'T CLOSE THE OVEN DOOR YET. You are not finished.
- Take your freshly boiled kettle of water, and gently pour into the baking dish in the oven, around the ramekins, until the water reaches about 1/2 - 2/3 of the way up the sides of the ramekins.
Gently slide the shelf in to the oven and close the door.
This avoids accidentally sloshing water, burning your hands and ruining your lovingly prepared Brûlée.
With regard to oven temperature, always err on the side of caution and underestimate your temperature. I prefer an oven that is a little bit cooler than the recipe states to avoid over heating the eggs and curdling. All it means is that the dessert spends a few more minutes in the oven setting, but that is time well spent, if it means avoiding curdling.
Crème Brûlée & Orange Tuiles
INGREDIENTS
75g caster sugar
5 egg yolks
100g raspberries (frozen if fresh unavailable)
50 mls milk
450 mls thickened cream
1 vanilla pod or 1 teaspoon vanilla paste
caster sugar for topping
TUILES
55g butter
60g caster sugar
2 egg whites, unbeaten
65g flour
finely grated zest of 2 oranges
METHOD
Pre heat the oven to 140°C. In a medium bowl whisk the sugar and eggs together.
Divide raspberries evenly between 4 x 1 cup ramekin dishes. Heat the milk and cream along with the scraped vanilla bean. Transfer to the egg mixture and mix until combined. Transfer to a large jug and pour into the ramekins.
Place in a bainmarie of hot water and bake in the oven for 40 minutes. Allow to cool and set, then chill in the fridge.
Sprinkle the tops with a thin layer of caster sugar. Using blow torch in constant movements, melt sugar until golden.
TUILESPreheat oven to 160°C. Whip butter and sugar by hand until pale. Fold in egg whites slowly and follow with zest and flour.
Rest for 20 minutes and then spread onto a baking tray covered with baking paper to desired shape, using a palette knife.
Bake for 10- 12 minutes or until just golden.
Serve with Crème Brûlée.
This whole day was a very worthwhile exercise and I will definitely be doing it again. Everyone was in a great mood and a bunch of people, many of whom had not met before, got together for a meal and a great cause. Combining my hobby with sharing a great day with friends and being able to use that to give back to people in need was very satisfying. In the end, we raised close to $700.
I had been tweeting about my lunch and hash tagging Oxfam to help create some buzz around the event generally. As a reward for my effort, the awesome people at Oxfam noticed and sent me a gorgeous hamper filled with fair trade Oxfam goods!
To find out more about Oxfam and all the projects, events and products they support and provide, take a look here.
I love getting feedback on how my recipes have worked out for you or what you think of what I'm saying or cooking. All responses graciously received!

AS per usual you are making me hungry and very jealous of your talents.....a wonderful recipe....I am off to buy the ingredients and bake awayyyyyyy!!!!!!Love love love the photos!
ReplyDelete